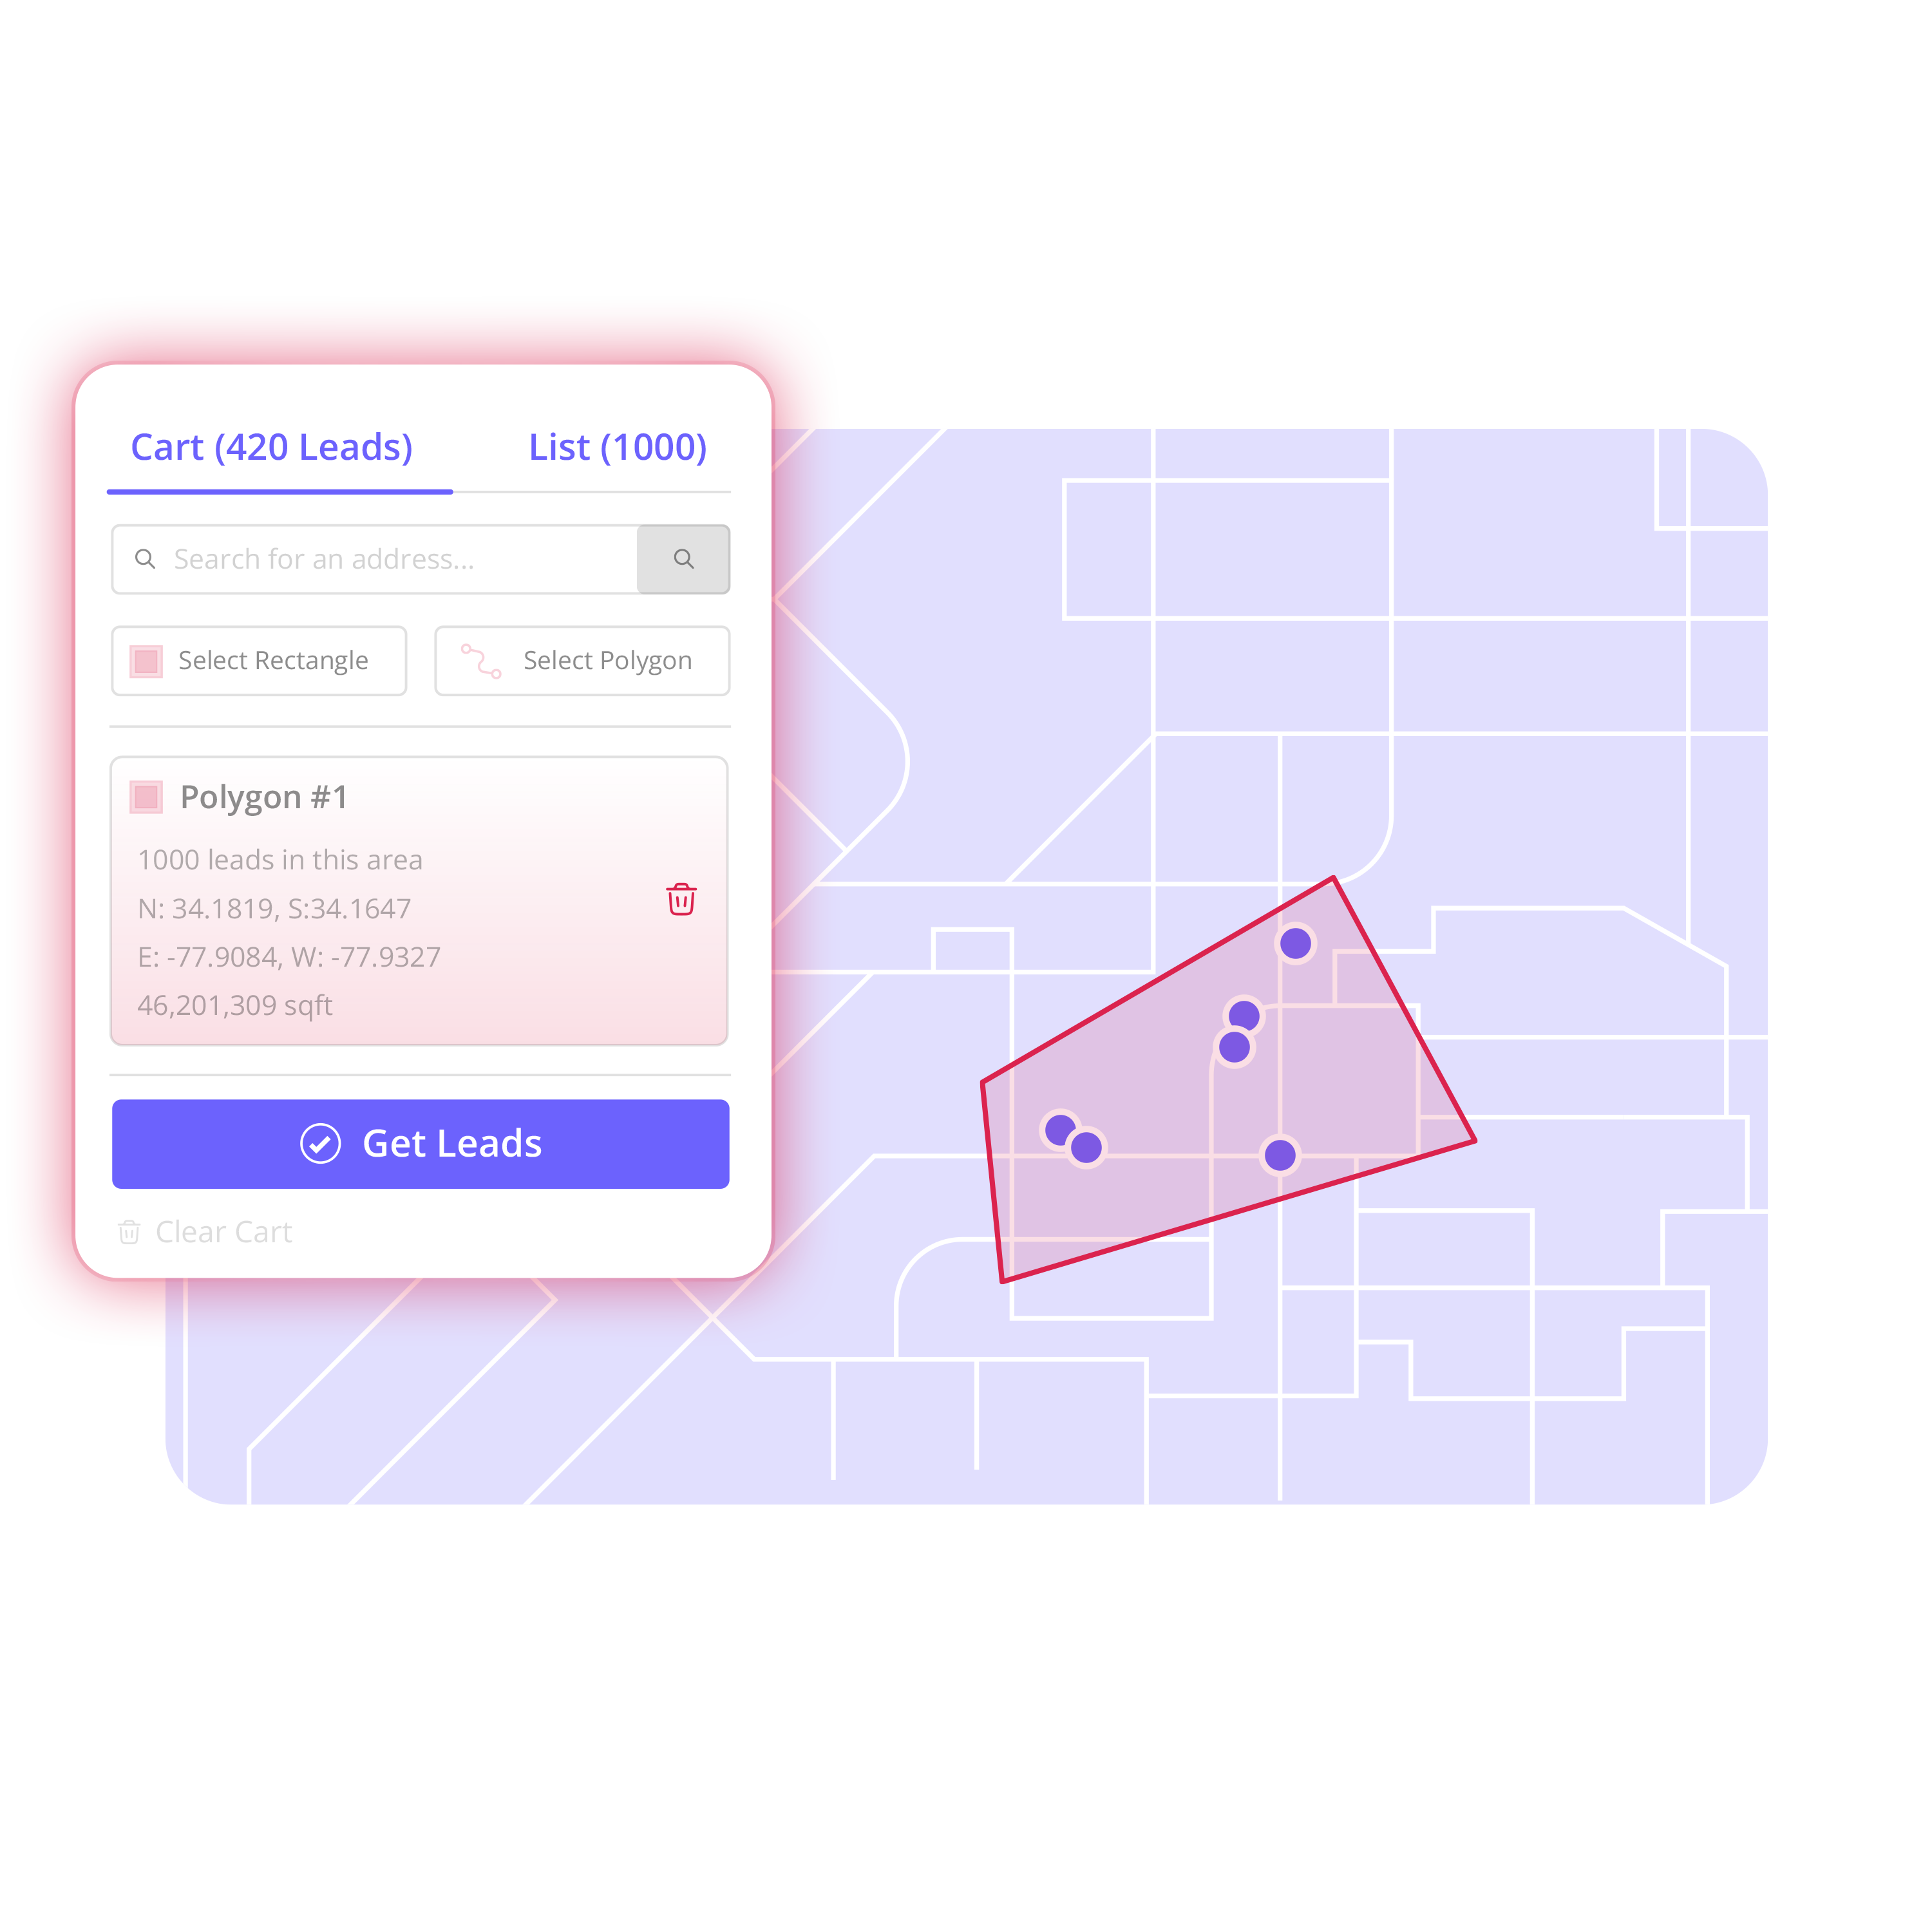

A completed roof should not be the end of a neighborhood opportunity. Roofing map tools help your team start with the streets around that job, identify the properties worth working, and turn the area into an organized prospecting campaign. Choose the area. Build the list.
For roofing companies that rely on canvassing, direct mail, outbound calling, or neighborhood saturation, the map matters before the spreadsheet does. A generic list may contain thousands of records, but it does not tell your reps which streets support the campaign you actually want to run. The right map-first workflow gives you geographic control, clear ownership, and a usable list your team can act on.
What Roofing Map Tools Should Help You Do
The practical purpose of a roofing map tool is simple: move from a location to a focused prospect list without spending hours cleaning raw data. It should let you search an address, view the surrounding area, select the properties you want, and organize those records for the next step.
That sounds basic, but it solves several common field problems. A sales manager may have a new roof installed on a street with older homes nearby. A canvassing manager may need to define a storm-response area before assigning reps. An owner may be expanding into a neighboring town and want to build a campaign around specific subdivisions rather than buying a broad county list.
The tool should support the decision your team has already made: this is where we want to sell. It should not force you to accept a prebuilt geography that does not match your routes, service area, job-site concentration, or rep assignments.
A useful system typically gives your team a searchable lead map, clear property visibility, area-selection controls, and a way to organize selected records. From there, you can add available contact information to the records that matter and export campaign-ready data into the tools your team already uses.
Start With the Neighborhood, Not a Massive List
The strongest roofing campaigns often begin with a specific reason to work a specific area. Maybe your crew just completed a visible replacement. Maybe hail affected a cluster of neighborhoods. Maybe one sales rep has momentum in a subdivision and needs a defined territory to continue working.
Starting with the neighborhood creates a more practical campaign than starting with a large, unfiltered file. Your team can see the boundaries, avoid streets that are outside the plan, and make decisions based on the actual layout of the area.
There is a trade-off. A tight area produces a more focused list, but it may not create enough prospects for a large canvassing team. A wider area gives you more volume, but it can dilute the local relevance of the campaign and make rep management harder. The right size depends on your available team, the campaign channel, and how long you plan to work the territory.
For a completed-job campaign, the best first move is usually to locate the job address and inspect the surrounding blocks. For an expansion campaign, search the city or subdivision, then identify the streets that fit your sales plan. For storm response, define the area your team can realistically cover before building the list.
The Map-to-Prospect Workflow
A roofing map tool earns its place when it reduces the steps between geography and outreach. The workflow should be clear enough that an owner, sales manager, or field rep can prepare a campaign without passing spreadsheets back and forth.
1. Search the map and choose the area
Search for the completed job, target neighborhood, city, or local landmark. Then use the map to review the streets around it. Look for natural boundaries such as major roads, neighborhood entrances, commercial corridors, or areas already assigned to another rep.
Next, draw the campaign area. Rectangle selection can work well for a simple grid of streets. Polygon selection is more useful when the neighborhood has irregular borders, a cul-de-sac layout, or sections you need to exclude. The goal is not to draw the biggest shape possible. It is to draw the exact streets your team intends to prospect.
This step creates clarity before anyone starts knocking doors, calling, or preparing mail. Everyone can see what belongs in the campaign and what does not.
2. Find available properties and select the right records
Once the area is defined, review the properties inside it. Depending on the tool and available data, you may be able to see property-level records and existing contacts already in your system.
Existing-contact overlays are especially useful when your company has worked an area before. They can help your team avoid treating every address as brand new, spot prior conversations, and reduce duplicate work. A map alone does not solve territory overlap, but a visible record of what is already in your database makes better decisions possible.
Select the records that fit the campaign. That may mean every available residential property within a small neighborhood, or it may mean a more deliberate set of streets. Do not confuse volume with readiness. A list that your team can clearly work is more useful than a larger file that nobody owns.
3. Build an audience for the campaign
Turn the selected properties into an Audience or organized list. Give it a name that tells the team what it is and why it exists, such as “Oak Ridge - Completed Job Surrounding Streets” or “Westfield - April Storm Response.”
A clear name matters later. When campaigns pile up, vague labels like “New Leads” create confusion. A descriptive Audience gives sales, marketing, and operations a shared reference point for the area, the campaign reason, and the intended use.
Territory is built around this map-first process: search the map, draw an area, select leads, create an Audience, enrich what matters, organize the work, and export when ready. It is a lightweight way to turn a territory into an organized prospecting campaign rather than another disconnected spreadsheet.
4. Enrich only the records you plan to pursue
Contact enrichment can add available homeowner or property-owner information to selected records. Use it selectively. Build the territory first. Enrich what matters.
That approach controls unnecessary data work and keeps the campaign focused on records your team has actually chosen. If you are running a small surrounding-job campaign, enrich the selected list rather than paying attention to a much broader market you may never work. If you are testing a new expansion area, start with one defined section, then widen the campaign based on your team's capacity.
Available contact information is not the same as a request for contact or marketing consent. Your company still needs to follow applicable calling, texting, mailing, privacy, and do-not-contact requirements. The map tool helps organize the territory and records. Your operating process should govern how outreach is handled.
5. Assign, organize, and export
A list is only useful if the next action is clear. Assign prospects to the appropriate rep or team, set statuses, and add notes where needed. A canvassing manager may divide an Audience by street. A sales manager may hold certain records for direct mail while assigning others for field follow-up. An owner may want to keep one campaign unassigned until staffing is available.
Lightweight CRM functions such as list views, board views, assignees, statuses, notes, and activity provide enough structure to keep a campaign from becoming a static export. They are not a replacement for every operational system a roofing company uses. They help the prospecting list stay organized while the team works it.
When the list is ready, export the data for the campaign channel you use. That might be a calling workflow, a direct-mail preparation process, or another approved outreach tool. The point is not to trap your data in the map. It is to get from map to prospect list with less cleanup and clearer ownership.
Where Roofing Teams Get the Most Value
Completed-job prospecting is the most straightforward use case. Your crew finishes a roof, your sales team locates the address, and a manager draws the surrounding streets. From there, the team selects properties, creates an Audience, enriches selected records, and assigns the campaign. Turn your last roofing job into your next neighborhood campaign.
Storm-response prospecting follows the same structure, but requires more discipline around boundaries. Do not let a storm area become an undefined mass of records. Choose the neighborhoods your team can cover, create separate Audiences when needed, and give each area a clear owner. This makes it easier to manage capacity and prevent multiple reps from working the same ground.
Market expansion also benefits from map-first planning. If your company wants to test a new city or subdivision, begin with a specific area rather than importing every possible record across the market. A controlled first campaign is easier to organize, measure operationally, and repeat if the team decides the area is worth further attention.
Common Mistakes to Avoid
The first mistake is choosing an area that is too broad because more records feel safer. Broad lists create more cleanup, more unclear ownership, and more opportunities for reps to overlap. Start with a workable territory, then build outward deliberately.
The second is enriching everything before the campaign is defined. This reverses the useful order of operations. Choose the area first, select the properties, then add available contact information to the records you intend to work.
The third is treating an exported file as the whole campaign plan. Before export, establish who owns the list, what outreach channel will be used, how status updates will be captured, and how existing contacts will be handled. Clean data without a clear working process still becomes wasted effort.
The best roofing map tools do not replace field judgment. They give that judgment a clear operating path. Start with the neighborhood, define the streets, build the list your team can own, and put the next campaign in motion.